Building (and rebuilding) a 3D Printer
Two things set me up for success with my arduous project of building and using a 3D printer kit: using a variety of 3D printers before, and everything I learned while creating my CNC plotter. In late 2019 I was given a non-working 3D printer kit with minimal instructions (in Chinese), missing hardware, and a rats nest of wires. In only a few weeks I reassembled the printer frame and began using it! Only to find out it needed weeks more work. I split this write up into mechanical and software categories for clarity- but the hard part of any project is making the two work synchronously.
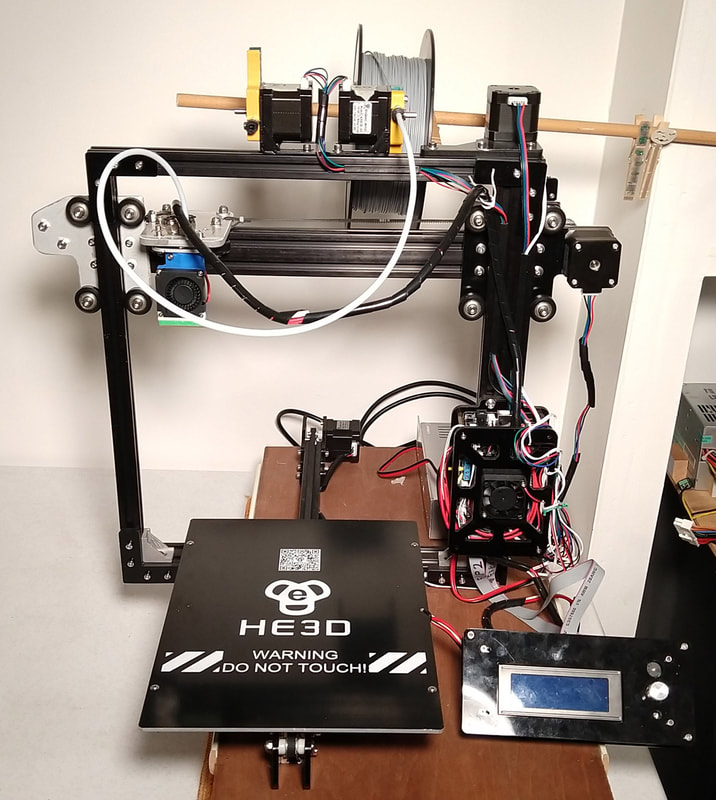
This is the printer as it sits currently, with months worth of tweaks and improvements.
This is the printer as it sits currently, with months worth of tweaks and improvements.
My 3D Printing History
I have a history of using 3D printers that began around 2014, making prototype parts for my remote control truck on an original Makerbot Replicator 2. In high school I was put in charge of our library's new Ultimaker 2 because our computer science teacher did not know it worked, and I did. When other students inquired about using it, he sent them my way and I taught them how to design and print parts. While working at Ventures, I used Formlabs SLA printers and others in a professional environment to make prototypes and mockups for clients.
All of this prior 3D printing experience left me with a thorough understanding of the process: designing parts to optimize print quality and strength, fundamentals of layer height and accuracy, and how to generate print instructions using slicing software. However, this knowledge only applies to a printer that worked - and mine did not. In order to successfully build my printer I had to combine my existing knowledge with new learning about mechatronics: stepper motor control, programming Arduino-based CNC control, calibrating motion kinematics, and others.
Project - Mechanical Side
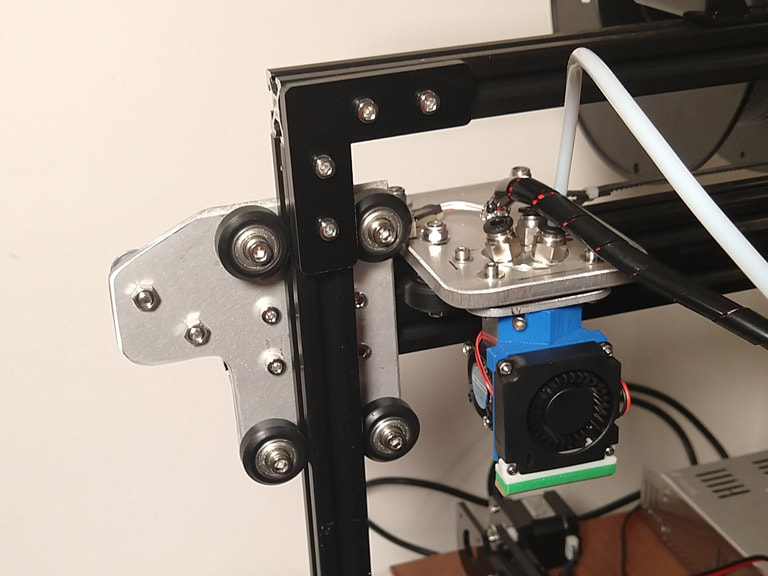
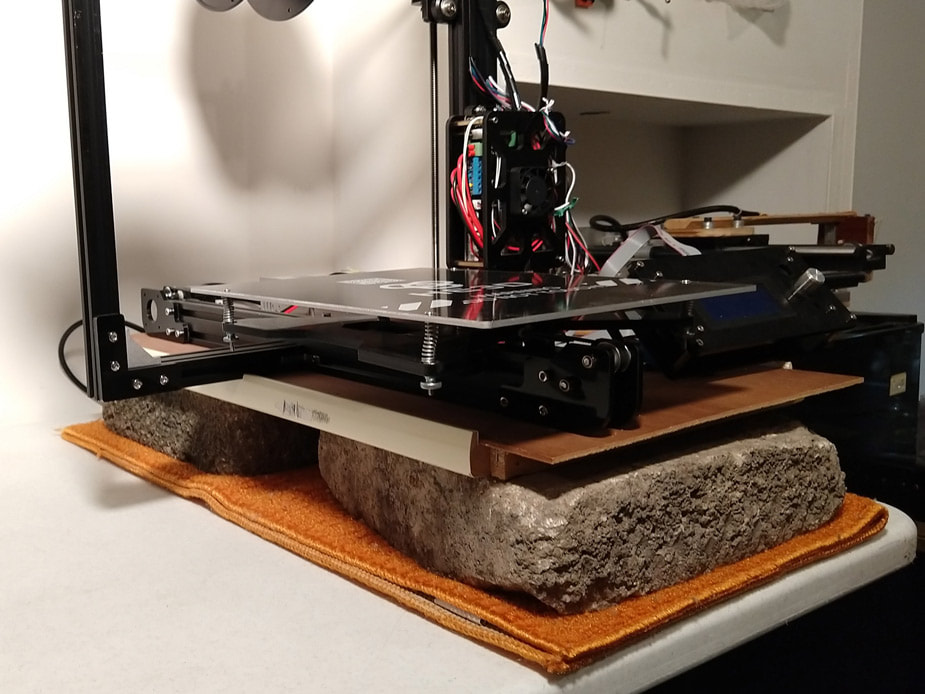
The kit came to me in a pile of individual pieces. I assembled the frame by filing parts to fit tightly, resulting in a rigid structure. I took special care to keep each axis precisely orthogonal and the bed flat (I eventually achieved <0.1 mm flatness across the entire bed surface). Each of the axes roll along the frame on wheels (not a good design in my opinion) which I painstakingly adjusted for minimal backlash and smooth effortless movement. I quickly found the original plastic pieces distorted and bent under the clamping forces keeping the wheels tight. I needed to remake two plates in aluminum (below left photo) before the X and Z axes could move at all. The timing belts and pulleys were very fussy about alignment and rolling smoothly, forcing me to completely replace the X-axis bearings because they were preinstalled incorrectly. Finally I created a wooden base to make the screen, frame, and power supply into a single unit. The printer sits on concrete blocks and carpet (right below) to damp noise and vibrations, both because the table amplified noise and because printing vibrations were visible on completed prints.
I have a history of using 3D printers that began around 2014, making prototype parts for my remote control truck on an original Makerbot Replicator 2. In high school I was put in charge of our library's new Ultimaker 2 because our computer science teacher did not know it worked, and I did. When other students inquired about using it, he sent them my way and I taught them how to design and print parts. While working at Ventures, I used Formlabs SLA printers and others in a professional environment to make prototypes and mockups for clients.
All of this prior 3D printing experience left me with a thorough understanding of the process: designing parts to optimize print quality and strength, fundamentals of layer height and accuracy, and how to generate print instructions using slicing software. However, this knowledge only applies to a printer that worked - and mine did not. In order to successfully build my printer I had to combine my existing knowledge with new learning about mechatronics: stepper motor control, programming Arduino-based CNC control, calibrating motion kinematics, and others.
Project - Mechanical Side
The kit came to me in a pile of individual pieces. I assembled the frame by filing parts to fit tightly, resulting in a rigid structure. I took special care to keep each axis precisely orthogonal and the bed flat (I eventually achieved <0.1 mm flatness across the entire bed surface). Each of the axes roll along the frame on wheels (not a good design in my opinion) which I painstakingly adjusted for minimal backlash and smooth effortless movement. I quickly found the original plastic pieces distorted and bent under the clamping forces keeping the wheels tight. I needed to remake two plates in aluminum (below left photo) before the X and Z axes could move at all. The timing belts and pulleys were very fussy about alignment and rolling smoothly, forcing me to completely replace the X-axis bearings because they were preinstalled incorrectly. Finally I created a wooden base to make the screen, frame, and power supply into a single unit. The printer sits on concrete blocks and carpet (right below) to damp noise and vibrations, both because the table amplified noise and because printing vibrations were visible on completed prints.
|
|
Firmware
Once again, I struggled with the software side of this project. Before I could load and print a file, the machine needed to know hundreds of parameters to correctly translate software commands to complex physical movement. The printer is Arduino-based and shipped 'pre-calibrated' with firmware that was advertised to work out of the box. Spoiler alert - it did not. There were a host of calibration issues I fixed by studying documentation and re-flashing configuration updates to the controller. I created pounds of plastic spaghetti printing (and failing) numerous test parts. The list of problems I fixed include:
Software
I experimented with several slicer programs (Slic3r, Cura, Repetier Host) through this process, and finally settled on Cura for ease of use and clear documentation (amazing for open source software!). Cura has hundreds of profiles customized for specific printers - but of course none for my home built jalopy. I modified generic parameters to achieve success on my specific printer. I updated slicing variables for stellar first layer adhesion, faster printing speeds, accurate extrusion width and part dimensions, multiple strategies to prevent warping, better cooling control, preventing stringing, and many more.
It took me months of work to print to achieve print reliability and half-decent print quality, but I am finally at the point of being able to print useful items. I constantly find ways the printer can solve problems encountered in other projects.
Once again, I struggled with the software side of this project. Before I could load and print a file, the machine needed to know hundreds of parameters to correctly translate software commands to complex physical movement. The printer is Arduino-based and shipped 'pre-calibrated' with firmware that was advertised to work out of the box. Spoiler alert - it did not. There were a host of calibration issues I fixed by studying documentation and re-flashing configuration updates to the controller. I created pounds of plastic spaghetti printing (and failing) numerous test parts. The list of problems I fixed include:
- Incorrect motor steps/distance on all axes
- Extruder direction reversed (it pushed filament away from the printer...)
- Wrong extruder steps/filament distance
- Hot end and bed heater PID control parameters (to stop 15 deg. C temperature oscillations)
- Re-ordered machine homing routine
- Configure limit switches and maximum machine travel
- Reversed direction of control knob
- Adjusted stepper motor current limits for enough torque
- Improved axis travel speeds and acceleration
Software
I experimented with several slicer programs (Slic3r, Cura, Repetier Host) through this process, and finally settled on Cura for ease of use and clear documentation (amazing for open source software!). Cura has hundreds of profiles customized for specific printers - but of course none for my home built jalopy. I modified generic parameters to achieve success on my specific printer. I updated slicing variables for stellar first layer adhesion, faster printing speeds, accurate extrusion width and part dimensions, multiple strategies to prevent warping, better cooling control, preventing stringing, and many more.
It took me months of work to print to achieve print reliability and half-decent print quality, but I am finally at the point of being able to print useful items. I constantly find ways the printer can solve problems encountered in other projects.
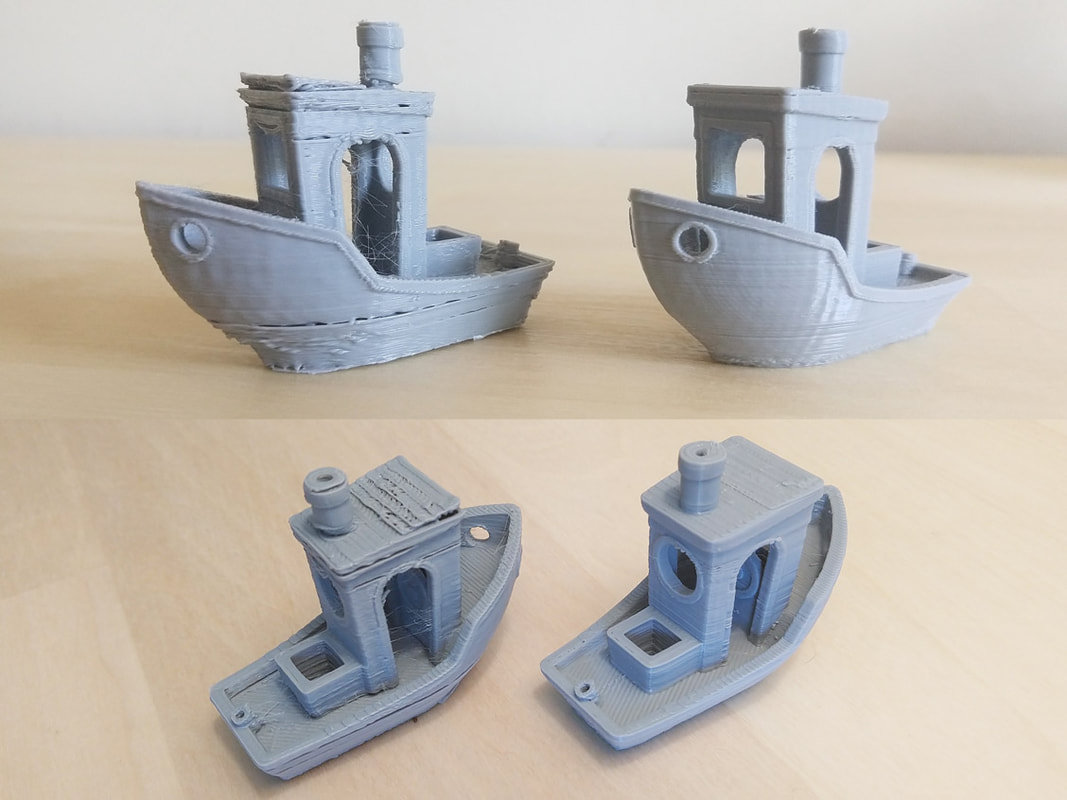
3DBenchy before (left) and after (right) optimizing firmware and slicer parameters.
|

Printed suspension mounting points on my custom remote control truck.
|
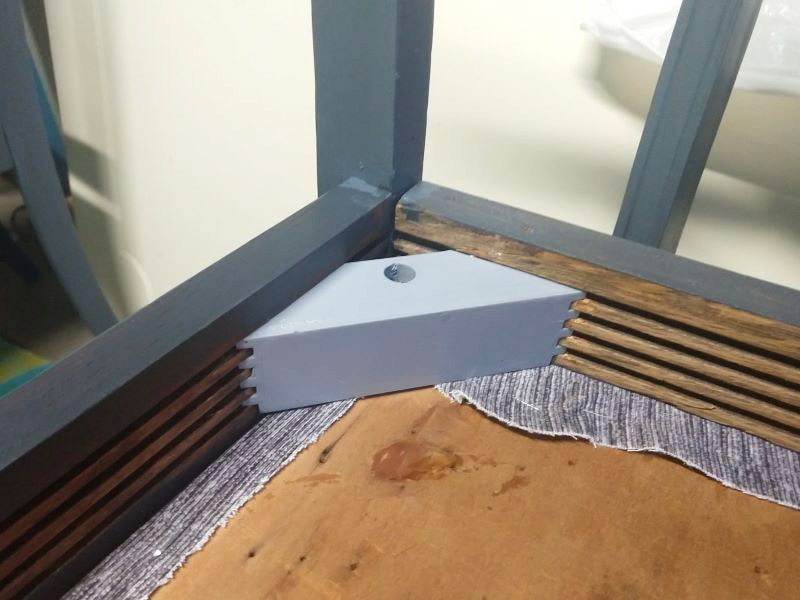
Printed part on chairs I refurbished, replaces broken wood pieces.
|
